
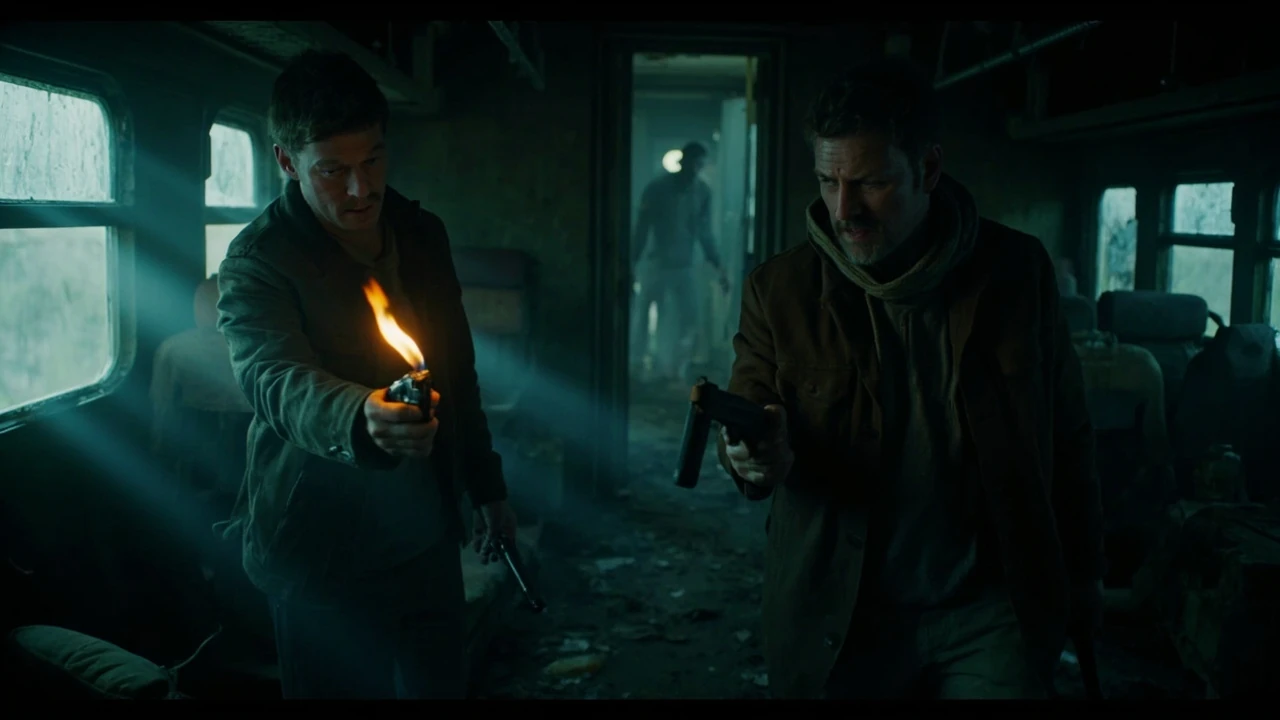

Resident Evil 0 walkthrough
Becky and S.T.A.R.S. bravo-team medic Rebecca Chambers step onto the Ecliptic Express at the start of Resident Evil 0 because the game opens on a moving train, which means the entire first act takes place inside a confined, multi-carriage environment. That single design choice shapes every walkthrough decision that follows: a train car has fixed boundaries, scripted encounters, and item locations that the engine loads each time the player transitions between cars. The result is a survival horror chapter that feels closer to a guided experience than a free-roaming map, and it is a useful case study in how early 2000s level design controlled pacing through physical choke points.
For readers who want a complete Resident Evil 0 walkthrough, this guide treats the game as a system of decisions rather than a list of item locations. Inventory pressure, partner management, the use-it-or-lose-it item duplication trick, and the lack of a storage box all matter from the moment the first zombie blocks the dining car. The same mechanics then resurface on the Umbrella training facility, in the leech-infested laboratory levels, and across the two transformations of the final boss. Walking through each chapter with that lens in mind produces a run that is faster, calmer, and far less wasteful than a blind first attempt.
The guide is also useful as a developer-side case study. Resident Evil 0 was the first mainline Resident Evil title to let a second character follow the player, the first to abandon a storage box in favor of a shared inventory, and the last pre-production release by Capcom production studio 3 before the team split into Clover Studio and a smaller internal group. Those design decisions are visible in the level flow, the door load triggers, and the way enemy placement rewards careful routing. A walkthrough that names those mechanics explains why a section feels the way it does, not just what to do in it.
How Resident Evil 0 is structured
Resident Evil 0 divides its play time into four clear regions. Each region has its own item pool, its own enemy roster, and its own save rule. Understanding that structure is the single biggest advantage in any run, because the wrong assumption about what is in scope will push the player to carry useless items across a long transition.
- Act 1 — Ecliptic Express. A moving passenger train split into a locomotive, a tender, a passenger section, a dining car, a cargo car, and a conductor’s room. The train acts as a tutorial for the partner system, the only inventory in the game, and the distinction between stun and kill on standard enemies.
- Act 2 — Umbrella training facility. A surface building with dormitories, a meeting room, an armory, a garage, and a courtyard. This act introduces the leech zombies, the first real puzzle that combines two character inventories, and the only moment in the game where the player can choose to destroy the training facility or to access a hidden laboratory below it.
- Act 3 — Hidden laboratory. An underground research complex with a power station, a treatment plant, a test lab, and the Marcus boss arena. The act is a long descent that ends with the reveal that the game has been using two timelines in parallel.
- Act 4 — Final laboratory. The final showdown against Proto Tyrant and its transformation. After the second death animation, the story cuts to an epilogue that closes Rebecca’s chapter and ties the ending back into the original Resident Evil.
Across all four acts, the game uses one rule that drives most walkthrough mistakes: there is no item box. Every item a character picks up stays with that character until the player drops it, uses it, or hands it to the partner. The only ways to free inventory space are consumption, combination, the train’s built-in item transfer, and the microfilm duplication trick on a specific save desk. The walkthrough routes below are built around that rule.
Inventory and partner mechanics that define every route
Resident Evil 0 gives the player two characters, one shared inventory, and a list of items that is small enough to plan on paper. The partner system is the first design lesson of the game: Billy Coen can take damage that Rebecca cannot afford to take, but Billy cannot use first-aid sprays or healing items that the game classifies as Rebecca-only at this point in the timeline. That asymmetry is deliberate, and it is the reason a walkthrough cannot simply say “carry two sprays” without naming who carries them.
The second lesson is the cover-fire stance. When the player is aiming, the partner follows a simple AI: stay close, shoot enemies the player marks, and back off when a hunter grabs them. Cover-fire shots deal roughly one-quarter of a normal handgun shot’s damage, but they cost no inventory ammo and they pull a zombie off a downed character, which is the difference between continuing a run and restarting from the last save. The walkthrough treats cover-fire as a free action and never assumes the player has spare bullets for a fight the partner can finish.
The third lesson is item hand-off. Pressing the action button while standing next to the partner opens a small trading window. Any item can be moved in either direction, including keys, films, and weapons. The walkthrough uses this to solve a puzzle that the original design had no item box for: who is carrying the door key while the other character opens a chest. In practice, it is faster to keep keys on the partner while the player carries weapons, because a key in the front character’s hands wastes a turn on every door.
First chapter: the Ecliptic Express
The first chapter is a hands-on tutorial in everything the rest of the game will demand. It is also the most linear section of Resident Evil 0, which is a useful design point to study: the developers knew the partner system was new, so they built the train as a corridor. The walkthrough below assumes the player picks up everything they can carry, then returns for the rest once the partner is unlocked.
- Start of the game. The first weapon is a Beretta, a four-shot handgun, found on the floor of the first car. Pick it up. The next item is a knife on a seat, which is worth one free stab on a stunned zombie.
- Train dining car. The first zombie blocks the dining car and cannot be stunned with a single shot. Two handgun shots to the head, or three body shots, will drop it for a short count. The dining car contains a hunting-gun and two shells on the rear table. Take both.
- Train passenger section. A second zombie and a crawling zombie block the way. The crawl can only be killed by a headshot from the handgun or one shell from the hunting gun. The two are best handled as a pair: stun the standing zombie, then perform the headshot on the crawler, then return to the standing zombie before it gets back up.
- Train cargo car. The cargo car is the first place the player can hand items to the partner. The walkthrough recommends dumping empty or low-value items here, because the second half of the train is the long supply run.
- Locomotive. The locomotive introduces the train’s moving end. After the cinematic in the engine room, the train derails, and the player has access to a second save desk, the first ink ribbon, and the first microfilm for the duplication trick.
The first save desk is the first place the game tests inventory discipline. The walkthrough recommends saving here, then walking through the next cars with a clear inventory plan: Rebecca carries the Beretta, the hunting gun, two shells, one spray, and a green herb. Billy carries the rest. This split keeps a single door from forcing the player to drop a weapon in front of a zombie.
Item duplication trick explained
The microfilm duplication trick is the single biggest inventory cheat in any Resident Evil 0 walkthrough, and it is a useful design artifact. Capcom shipped the game without an item box and had to give the player a way to multiply consumables. The trick is performed on a save desk in the Umbrella training facility, in the dormitory on the upper floor. The process is deterministic: drop a stack of three identical items on the save desk, save, load, and the items return as six. Stacks above three are not multiplied; the player can only double a stack of exactly three.
| Stack to duplicate | Drop and save pattern | Result on reload | Notes |
|---|---|---|---|
| Three handgun bullets | Drop on the dormitory save desk, save, reload | Six handgun bullets | Handgun bullets are the easiest fuel for the trick because the player collects them in threes early. |
| Three magnum rounds | Drop and save the same way | Six magnum rounds | Magnum rounds are rarer; only duplicate once the magnum is actually in hand. |
| Three shotgun shells | Drop and save the same way | Six shotgun shells | Works the same as magnum rounds; do not duplicate before the hunting gun is in hand. |
| Three first-aid sprays | Drop and save the same way | Six sprays | Sprays weigh one slot each, so the duplication fills the inventory fast. Plan around the partner. |
The duplication only works on the dormitory save desk in the training facility, and it only works once per stack. The walkthrough uses it twice on a first run: once for handgun bullets, once for shotgun shells. That two-step duplication covers most low-resource mid-game fights without forcing a player to backtrack.
Second chapter: the Umbrella training facility
After the train derails and a long cutscene sequence, Rebecca wakes up in the dormitory of a training facility owned by Umbrella. The act is a wide building with a central courtyard, two side wings, and a sub-level that holds either a one-way exit or a route into a hidden laboratory, depending on the player’s choice. The walkthrough below assumes the player takes the route into the hidden laboratory, because that is where the strongest items and the first true boss encounter are located.
- Dormitory. The dormitory contains the second save desk, the only dupe-desk in the game, a green herb in a locker, and the lighter. The lighter is mandatory for the next puzzle and cannot be dropped.
- Armory. The armory contains the grenade launcher once the player returns the correct key. The launcher fires three shell types: explosive, acid, and incendiary. The walkthrough recommends keeping all three because the rest of the game tests each one.
- Courtyard. The courtyard is the first open area. Hunters will appear here, and the leech zombies that replace the standard zombies will be the first enemy that cannot be stunned with a headshot. The walkthrough recommends saving the grenade launcher acid rounds for the first leech cluster.
- Garage. The garage is the chapter’s only item sink: a fuel can sits on a workbench, and the player has to combine it with the lighter in the inventory to light the way forward.
- Choice room. At the end of the act, the player can either trigger the self-destruct sequence or pull the central lever to access the hidden laboratory. The walkthrough recommends the laboratory because it contains the third weapon, the only spare ink ribbon, and the first real boss fight against a Tyrant variant.
This act is also the first time the game introduces variable enemy spawns. After the self-destruct lever is ignored, leech zombies will start appearing in the dormitory hall at specific checkpoints. Saving in the dormitory is the safest checkpoint; the walkthrough uses it as a fall-back before every laboratory visit.
Third chapter: the hidden laboratory
The hidden laboratory is a long descent into a research wing that mirrors the design philosophy of the train: a single path with locked doors, fixed spawn points, and a final boss that the game treats as a tutorial for the final boss. The walkthrough here focuses on the four rooms that matter, in order, because the rest of the laboratory is corridor.
| Room | Key item | Enemies | Walkthrough note |
|---|---|---|---|
| Power station | Battery pack and circuit breaker | Two leech zombies and one hunter | The breaker must be carried by Billy because the power station has a single use slot. |
| Treatment plant | Empty battery, lab keycard, and the chemical fuel | Three leech zombies and a lurker | Combine the empty battery with the chemical fuel, then use it on the second breaker. The lurker here drops a magnum round on a critical hit. |
| Test lab | Test subject log and the laser room override | Two leech zombies and one stun-immune variant | The test lab holds the data the final cutscene refers to, so the walkthrough recommends reading the log before the boss. |
| Marcus boss arena | Nothing to pick up | Marcus, an infected human in a mech suit | Marcus is the only boss with two phases and a different attack set on each phase. Acid grenade rounds are the strongest single-weapon answer. |
The Marcus fight is the only place in the game where a single weapon beats a boss without a partner attack. The acid grenade round applied to the mech’s shoulder vents ends phase one in a single hit. Phase two starts when Marcus discards the suit, and the walkthrough recommends three shotgun shells at close range to finish the fight before his grab animation completes.
Fourth chapter: the final laboratory
The final laboratory is short, deliberate, and structured around the second encounter with the Tyrant line. The first half of the act is a single corridor and a save room; the second half is a two-phase boss fight against Proto Tyrant. The walkthrough treats this act as a single combat encounter, because the only item the player needs before the boss is a single green herb, which can be left with the partner.
Phase one of the final boss has the player dodge a charge attack and a grab. The Tyrant takes 50 percent more damage from the grenade launcher’s explosive rounds in this phase, which the walkthrough uses as a finisher. Phase two starts when the Tyrant transforms, gains a ranged laser, and begins a pattern of three charges followed by a sweep. The walkthrough recommends four to six magnum rounds in this phase because the magnum is the only handgun-caliber weapon that interrupts the Tyrant’s charge animation on a critical hit. The fight ends with a cinematic that does not consume the player’s last save.
Boss strategy reference
Every boss in Resident Evil 0 has a deterministic set of counters. A walkthrough that lists the right weapon and the right phase for each one removes the need to memorize attack patterns.
| Boss | Best primary weapon | Best secondary weapon | Cover-fire use | Save before the fight? |
|---|---|---|---|---|
| Stairwell zombie swarm | Shotgun at close range | Handgun for cleanup | Yes, on the closing zombie | Yes, dormitory |
| Hunter α pair | Shotgun, one shell each | Acid grenade if available | Yes, one headshot each | Yes, before entering the courtyard |
| Tyrant 001 (T-001) | Grenade launcher explosive | Magnum, four rounds | Yes, on the arm cannon | Yes, at the end of the chapter |
| Marcus phase 1 | Grenade launcher acid | Shotgun at close range | Yes, on the vents | Yes, after the log pickup |
| Marcus phase 2 | Shotgun, three shells | Handgun for cleanup | Yes, on the exposed head | Yes, same as above |
| Proto Tyrant phase 1 | Grenade launcher explosive | Magnum, two rounds | Yes, during the charge | Yes, save room before the fight |
| Proto Tyrant phase 2 | Magnum, six rounds | Shotgun if magnum is empty | Yes, during the laser | No, fight is short |
Common pitfalls and how to avoid them
A walkthrough is most useful when it names the things a first-time player is likely to do wrong. Resident Evil 0 has a small set of failure modes that recur across runs.
- Carrying too many keys. Keys are inventory-expensive and most are single-use. The walkthrough recommends leaving each key with the partner until a door forces a handoff, because that keeps the front character’s hands free for weapons.
- Forgetting the partner can shoot. Cover-fire is a free action and the most efficient way to drop a single zombie. The walkthrough uses cover-fire on every encounter that does not need a magnum round.
- Saving with the wrong stack on the desk. The dormitory save desk duplicates stacks of three. Saving on a stack of two or four is harmless but wastes the trick. The walkthrough leaves exactly three of the consumable it wants to double on the desk before saving.
- Missing the laboratory route. The act-2 self-destruct lever is the visible choice. Pulling it locks the player out of the strongest items in the chapter. The walkthrough recommends ignoring the lever and proceeding into the laboratory on a first run.
- Running past the leech zombies. Leeches cannot be stunned by a single headshot. The walkthrough treats them as a separate enemy type with its own counter, not as a tougher zombie.
- Forgetting to refill at the dormitory. The training facility dormitory is the only mid-game restock point. The walkthrough saves the dormitory, walks the laboratory empty-handed, and returns for the duplication on the way out.
How the partner system was designed
Resident Evil 0 introduced a second controllable character because the team wanted to design puzzles that required two inventories and two weapon sets. The system was implemented as a partner AI: the partner follows at a fixed offset, reacts to enemy aggro, and takes orders through the cover-fire command. The implementation choices that matter for a walkthrough are the cover-fire command, the item handoff window, and the partner’s reluctance to walk through a zombie.
The cover-fire command was a workaround for the partner’s inability to use a context-sensitive item. Instead of giving the partner a complex behavior tree, the designers gave the player a manual command that triggers a single shot. That design is visible in the level design: every partner-relevant puzzle is a room with one action on each side, and the player’s job is to alternate rooms while commanding the partner to take a shot. The walkthrough treats those rooms as two-room puzzles and solves them in two moves, not three.
For a developer, the interesting design lesson is the failure mode. Capcom shipped Resident Evil 0 in 2002 with a partner system that was new to the franchise, and the team’s later work at Clover Studio and beyond shows what they kept and what they dropped. The Clover titles kept the second character but moved the partner from an AI to a second player. Modern Resident Evil titles kept the inventory pressure but removed the partner. The walkthrough’s item routes are a useful map of why each choice was made.
Why there is no item box
Resident Evil 0 was designed around the partner system and the dupe trick because the team decided the absence of an item box would force the player to plan. The decision was editorial: a box removes the inventory pressure that defines the franchise. The dupe desk was the substitute. That decision is the reason a walkthrough has to plan around two characters instead of one, and it is the reason the dormitory save desk is the most important room in the second act.
For a reader who is interested in the game design, the walkthrough’s inventory plan is more informative than the boss list. The team that built Resident Evil 0 wanted the player to make trade-offs that the box would have erased, and the walkthrough reflects that.
Recommended route order for a first run
The route below is a single, continuous pass through the game that a first-time player can follow without backtracking. Each step is the next room in the path; no step is optional.
- Train start to dining car. Pick up the Beretta, the hunting gun, two shells, and the first-aid spray on the floor of the passenger section. Hand the spray to Billy.
- Dining car to cargo car. Drop empty item boxes in the cargo car. Pick up the second spray and the green herb from the cargo lockers.
- Cargo car to locomotive. Combine the green herb and the red herb into a mixed herb, then hand the mixed herb to Billy.
- Locomotive derail to dormitory. Save at the dormitory. Use the dupe trick on three handgun bullets.
- Dormitory to armory. Pick up the grenade launcher and one acid round from the armory. Hand the launcher to Billy.
- Armory to courtyard. Clear the courtyard with two shotgun shells and one acid round. Pick up the magnum from the locker.
- Courtyard to laboratory entrance. Pull the laboratory lever instead of the self-destruct. Save before the door.
- Laboratory to power station. Combine the empty battery with the chemical fuel. Hand the breaker to Billy.
- Power station to treatment plant. Use the lab keycard on the locked door. Pick up the second magnum round and the third green herb.
- Treatment plant to test lab. Read the test subject log. Save at the end of the test lab.
- Test lab to Marcus arena. Use the acid grenade on Marcus’s vents. Use the shotgun on phase two. Hand the shotgun to Billy after the fight.
- Marcus arena to final laboratory. Walk the corridor. Save in the save room before the Proto Tyrant fight.
- Proto Tyrant phase one. Use the explosive grenade rounds. Save the magnum for phase two.
- Proto Tyrant phase two. Use the magnum. The fight ends with a cinematic. Reload the save to play the epilogue.
Speedrun notes that are also useful for a casual run
Speedrunners use a small set of optimizations that translate well to a casual first run. Skipping the magnum until phase two of the final boss is one of them, because the magnum does not save meaningful time on the early bosses and a casual run loses the round to a missed shot. Another is the dupe trick timing: duplicating the shotgun shells at the end of the dormitory visit, not the start, because the player has a clearer inventory picture after the armory run. A third is the partner handoff: the walkthrough above hands the launcher to Billy at the start of the courtyard because Billy is the only character who can carry a heavy weapon while still taking the hit a hunter’s grab is going to land.
For a developer, the speedrun note that matters is the level load. Every time the player crosses a door in Resident Evil 0, the engine reloads the room and re-spawns the enemies in the previous room. That design is the reason the game feels slower than its play time: each room is a deterministic scene. A walkthrough that respects the load trigger runs faster than a walkthrough that does not.
Save management and ink ribbon rules
Ink ribbons return in Resident Evil 0 as a finite resource. The game gives the player a generous supply on a first run, but the dormitory save desk is the only one that is technically optional, and the laboratory is the only act where the player can run out if the route is wrong. The walkthrough below gives a count of ribbons per chapter, plus the rooms where they are easy to miss.
| Act | Ribbons available | Recommended save rooms | Risk if missed |
|---|---|---|---|
| Act 1 — Train | Three ribbons, all in the locomotive | Locomotive end, before the conductor’s room | Player reaches the training facility with no saves |
| Act 2 — Training facility | Two ribbons, one in the dormitory and one in the garage | Dormitory before the dupe, garage before the courtyard | Player loses the dupe desk and the magnum pickup |
| Act 3 — Laboratory | One ribbon, in the power station | Power station after the breaker pickup | Player faces Marcus with no checkpoint |
| Act 4 — Final laboratory | One ribbon, in the save room | Save room before Proto Tyrant | Player restarts the act on a death |
The walkthrough’s recommended save path is the dormitory and the final save room. Those two are the rooms where a failed run costs the most progress. Saving in the locomotive and the power station is a safer habit but a slower run.
Weapon and item checklist
The table below lists every weapon, every key, and every consumable that the walkthrough above touches, with the room where each one is picked up. Items not on this list are missable and not required for the main path.
| Category | Item | Pickup location | Used for |
|---|---|---|---|
| Weapon | Beretta handgun | Train passenger section | Standard encounters, leech cleanup |
| Weapon | Hunting gun | Train dining car | Stun, crawlers, Marcus phase two |
| Weapon | Grenade launcher | Training facility armory | Hunters, Marcus, Proto Tyrant phase one |
| Weapon | Magnum | Training facility locker | Proto Tyrant phase two, hunters on hard |
| Key | Train control key | Train conductor’s room | Locomotive door |
| Key | Lab keycard | Treatment plant locker | Test lab door |
| Consumable | First-aid spray | Train dining car and cargo car | Full heal |
| Consumable | Green herb | Train cargo car and lab | Partial heal |
| Consumable | Red herb | Train dining car | Combine with green for full heal |
| Consumable | Ink ribbon | Locomotive, dormitory, garage, power station, save room | Save |
What a developer can take from the walkthrough
For a developer or designer reading this as a case study, the walkthrough above is a map of design decisions rather than a route sheet. The partner system, the dupe trick, the load-on-door enemy respawn, the no-item-box rule, and the chained boss phases are all design choices that show up in the level flow. Each one is visible in the way the walkthrough is forced to plan: two characters, one inventory, fixed save points, and a final boss that requires the strongest weapon in the game to finish.
For a player, the same map is a way to plan a run. The walkthrough’s two recurring rules — keep the partner’s hands free for keys, and never carry a stack of three onto the dormitory desk without a plan — are enough to make a first run a calm one. For a developer, those rules are the design team’s evidence that the system they shipped works.
Resident Evil 0 is also a useful reference for studios that build survival horror systems in 2026. The franchise moved away from the partner AI in subsequent mainline entries, but the inventory pressure, the boss-phase chaining, and the door-load respawn are all still in the modern games. A studio that wants to ship a survival horror title without a partner can still take the inventory planning, the boss-phase pacing, and the dupe-trick substitution for an item box. The walkthrough is a working example of how each of those decisions is felt in the player’s hands.
Frequently asked questions
How long is a Resident Evil 0 walkthrough on a first run?
A first run with the dupe trick and the route above takes between ten and thirteen hours, depending on how often the player consults the route. A blind first run averages closer to fifteen hours because the player has to learn the partner commands and the door-load respawns. A second run on the same route drops to about seven hours, and a speedrun that skips the partner handoff windows runs in about ninety minutes.
Where is the dupe desk in Resident Evil 0?
The dupe desk is the save desk in the dormitory of the Umbrella training facility. The trick only works on that specific save desk and only on stacks of exactly three. Stacks of two or four are not multiplied. The walkthrough uses the dupe desk twice on a first run: once for handgun bullets, once for shotgun shells.
Can the partner die in Resident Evil 0?
Yes. Billy can die to standard enemies, hunters, and Marcus phase one. If the partner dies, the game continues, but several puzzles become unsolvable because the player loses a second inventory and a cover-fire target. The walkthrough treats partner death as a soft fail and recommends reloading the last save on a partner death.
Do I need the magnum for any fight before the final boss?
No. The magnum is useful on the hunters in the courtyard and on Marcus phase two, but the grenade launcher and the hunting gun are enough to clear both fights. The walkthrough saves the magnum for Proto Tyrant phase two, which is the only fight where it is mandatory.
Is the self-destruct ending different from the laboratory ending?
The endings are different in cinematic, not in difficulty. The self-destruct ending skips the Marcus fight, the Proto Tyrant fight, and the strongest weapons in the game. The laboratory ending is the canonical one because it ties back into the original Resident Evil. The walkthrough recommends the laboratory ending on a first run because the missing items make a self-destruct run less replayable.
Can the player skip the partner system and play Rebecca solo?
No. The partner system is mandatory for the entire game. Several puzzles, including the laboratory breaker sequence and the Marcus arena, require two inventories. A solo run is not possible without modifying the game.
What is the strongest single weapon in Resident Evil 0?
For most of the game, the grenade launcher is the strongest because it has three shell types and a damage multiplier against bosses. For the final boss, the magnum is the strongest because the magnum is the only weapon that interrupts the Proto Tyrant’s charge animation on a critical hit.
Are there any missable items in Resident Evil 0?
Yes. The dupe desk is missable if the player destroys the training facility. The magnum is missable if the player skips the laboratory route. The third green herb is missable if the player runs past the treatment plant. The walkthrough routes the player to each pickup to avoid the missable state on a first run.
Does Resident Evil 0 connect to Resident Evil 1?
Yes. The epilogue of Resident Evil 0 ends with Rebecca reaching the Spencer Mansion, and the game’s final cinematic references the events of the first Resident Evil. The walkthrough does not need to know the original game’s story to be useful, but the connection is the reason the original game’s story is sometimes referenced in the cutscenes.
What is the hardest enemy in the game?
On a first run, the hunter pair in the courtyard is the hardest encounter because both hunters can grab the player in the same animation. The walkthrough recommends one acid grenade round and one shell for the pair, with cover-fire on the second hunter during the cleanup.
Where this walkthrough leaves the player
A Resident Evil 0 walkthrough that plans around the partner system, the dupe trick, and the load-on-door respawn will finish the game with a calm first run and enough understanding of the level design to speedrun a second pass. The route above is built to be a single continuous plan, not a list of pickups, and it leaves the player with a clear inventory at each save. The game’s design choices — no item box, partner AI, two-phase bosses, and a fixed ribbon supply — are visible in the plan itself, which is the most useful thing a walkthrough can show.
For readers who want to compare the franchise’s design evolution, the historical context of the 2002 release is also a useful reference. Resident Evil 0 was developed at the same time as the Resident Evil remake, and the design language of both titles is closer to the original 1996 game than to the 2005 Resident Evil 4. A walkthrough that names the partner, the dupe, and the load trigger is also a walkthrough that explains why the franchise moved the way it did.
Leave a Reply